Setting up the Paramount MX+
Setting up the Paramount MX+
Yesterday I received the remaining parts for my new Paramount MX+ mount. This is a huge step up from my much lower capacity EQ6-R, and will let me reliably utilize larger and heavier payloads.
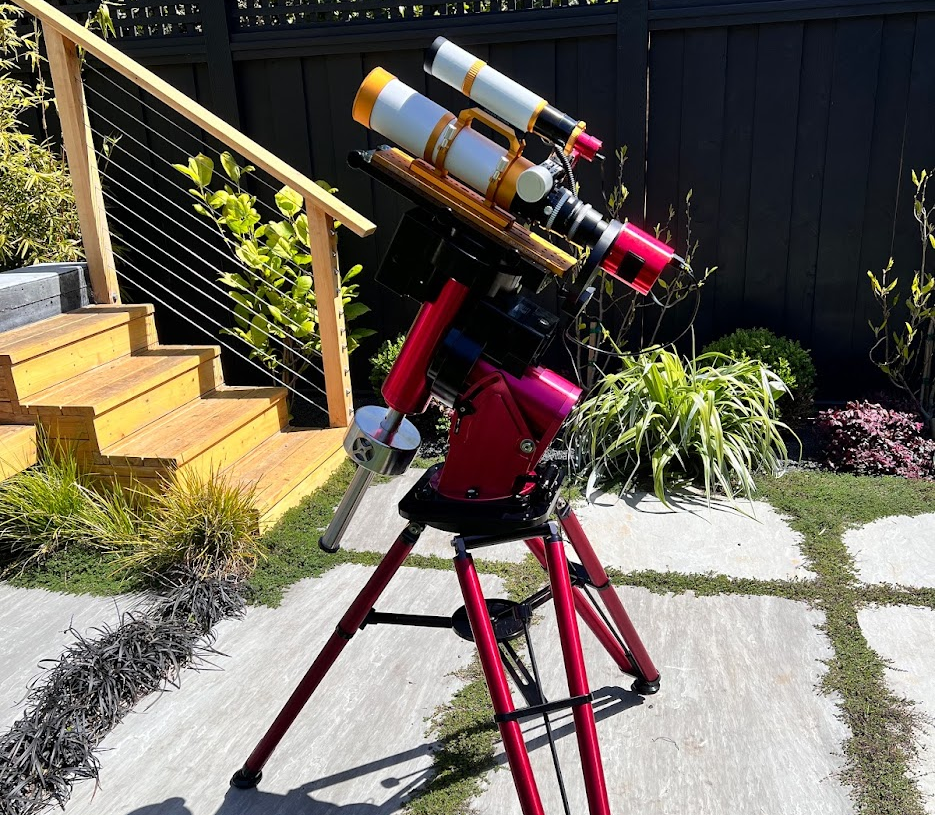
It was a significant investment financially, but also so far looking to be one from a learning curve as well. I didn’t find their documentation to be stellar, and it took me several hours on the first night to even get an attempted polar alignment. While I didn’t succeed, I’ll document what I’ve learned so far.
#Installing TheSky
The most controversial aspect of Paramount mounts is likely to be their software: TheSky. Software Bisque - the company behind both TheSky and the Paramount hardware - actually requires you to use their software in order to control the mount. While many players in the space also have their own software packages, this is the first one I’ve seen actually requiring their proprietary control suite be used. While they may claim some benefits, the open source enthusiast (and the business operator) in me would beg to differ.
What this looks like in practice is that I’ve got a completely different set of tools that are mandatory for one mount, whereas most other mounts I could use a variety of tools (such as N.I.N.A.). There’s a shade of gray to it as Software Bisque provides an ASCOM-compatible driver. This allows you to utilize other software to control the telescope, but does not remove the requirement of running TheSky while you do so. My mini PC is screaming in agony over these choices.
Quickly let’s cover the things you need to get up and running fully, adopting a similar setup as I documented previously:
Install your licensed version of TheSky Professional:
https://www.bisque.com/my-account/downloads/
Install the driver for your motor control (‘MKS 5000’ in my case):
https://www.bisque.com/downloads/mks-5000-usb-driver-installer-windows/
At this point I recommend going through the basic equipment setup in TheSky. The only minor departure from the instructions here was the labeling of the COM port for me. The documentation suggests it will be labeled something akin to ‘MKS5000’, but I only found a generic COM Serial Port.
Once you’ve confirmed you can connect to the mount you are ready to run the homing procedure.
Before homing, ensure both clutches are in tracking mode and the locking mechanisms are disengaged (this is obvious in hindsight, but was a bit confusing at first). To initiate homing you can do double click the paddle on the controller, or by select the ‘Telescope’ panel, clicking ‘Start Up’ > ‘Find Home’.
#Connecting N.I.N.A.
You’ll be able to configure N.I.N.A. and many others utilizing the ASCOM compatibility driver. Install it from:
https://www.bisque.com/downloads/ascom2xmount-adaptor-installer/
There’s a number of settings I’ve configured for mine, and I’ve made the decision (at least for now) to rely on PHD2, which means I’m not enabling ‘DirectGuide’:
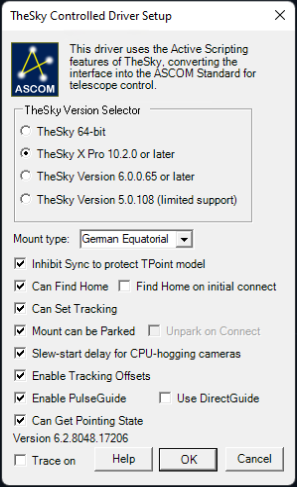
Huge thanks to this article from Byron Miller which helped me fast track this setup.
#Addressing Image Link - Error 653
A critical error in the documentation for me was how to actually successfully polar align the scope using TheSky. The process seemed straight forward until I got to the TPoint calibration. At this point I hit two different errors.
The first error was resolved by switching to “All Sky Image Link” - which appears to be a more flexible and updated version of their plate solving implementation. My understanding is the classic Image Link behavior requires a fixed image scale, however this is just telephone from a few posts I glanced at on the forums.
Once I switched All Sky I started receiving error 653 suggesting the image was missing RA/DEC coordinates, or otherwise not able to be solved. It turns out you need to download a separate database to be able to use All Sky Image Link at all. This was a fairly hefty download late in the evening unfortunately, but it was easy once I knew what to do.
Grab the All Sky Image Link Database on Software Bisque’s website:
https://www.bisque.com/downloads/all-sky-image-link-database-2/
Extract this to the folder where TheSky’s Application Support lives. For me this was:
C:\Program Files (x86)\Software Bisque\TheSkyX Professional Edition\Resources\Professional\Core Databases\Astrometry
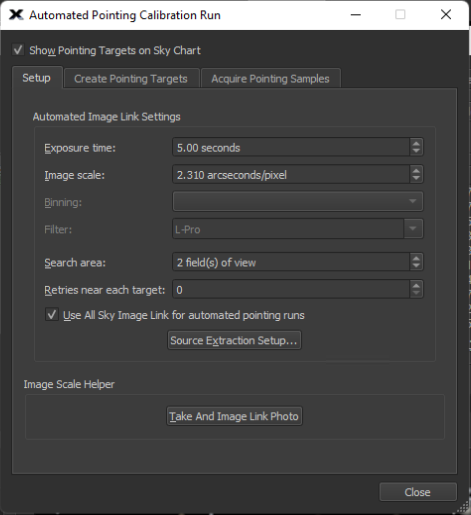
When running ‘Automated Pointing Calibration Run’, make sure Use All Sky Image Link for automated pointing runs is enabled:
#Next Up, Polar Alignment
On my first night I spent a significant amount of time figuring out how to resolve errors on Image Link. I followed the Rough Polar Alignment procedures, eventually was able to get the calibration running, and still failed to dial it in. Some of this was likely patience as it was already midnight by the time I had a reasonable attempt at using the APA tool. A number of software behavioral issues caught me by surprise, and if you read the forums people give different instructions than what is suggested by TheSky. Ultimately I was not able to get a polar alignment using TheSky.
Given it was already getting lately, I decided to try out SharpCap’s PA feature as I knew it was supposed to be similar to my experience with the ASIAIR. I quickly went through the process and got a sub-arcminute error margin, and proceeded to setup imaging. Unfortunately it seemed to still be fairly misaligned as slewing targets was wildly off center, and the re-centering behavior was taking upwards of 6-10 tries.
All in all my first night out was a frustrating learning experience. I’m hoping for more clear skies tonight so I can give TPoint another shot. Fortunately the price of a QHY Polemaster is negligible when compared to the price of the mount, so that will be my backup plan.
I will publish a follow-up when I successfully get the mount polar aligned.