My Journey Into Home Automation
My Journey Into Home Automation
A while back I moved into a new home, and with it I decided I wanted to explore the current state of the so-called “smart home” devices. Prior to this I had a couple of Philips Hue bulbs connected to Google Home, but that was the extent of it. Those bulbs only existed at the end of the day to make it easy to turn off lights with your voice. Well, barring the part where you have to shout “Hey Google” three times before the devices recognize whats going on. You’d think they’d come up with a better phrase which was easier to annunciate. I should mention I also had a fairly entry level Ubiquiti network — a high-end prosumer brand — that I had been using for a couple of years, and was extremely happy with.
This is part one of my journey into over engineering my house’s infrastructure, making terrible choices, and continuously iteration on those decisions. I’m intending to continue writing about this, and will likely cover a different topic in each post.
Rackin’ Up
The first thing I did upon moving in, whether it makes any sense or not, was upgrade my networking gear to the latest generation. I knew Ubiquiti had a v2 of their core controller which also would allow me to use their security cameras, and given the high quality experience I had previously it was the easiest decision I made. I also knew I wanted to move things into a rack mounted solution rather than stuffing them in a random end table. It’s worth noting that the core driver here wasn’t so much my OCD or curiosity, but more than I needed a centralized location for the hardwired ethernet in the house.
So, I quickly evaluated what I might need for a rack. I found a great Tripp Lite 12U wall-mounted rack on Amazon, and got to Prime’in. It had plenty of space to fit all of the networking gear, and would also let me replace my Intel NUC (which had recently croaked) with a small rack mounted PC.
Now when I went into this, I didn’t do nearly enough research on rack depths, so while the wall mounted unit was great, it was about two inches too short for me to mount the eventual server I built. That was my first mistake.
A few more things unfolded and I realized ultimately I wasn’t going to have enough depth, let alone vertical space or weight-capacity in this unit. I was hoping to not only mount the networking gear, but also this new 2U server, my 8-bay Synology NAS, and now I realized I needed several Sonos AMPs and the ideal location for them was also within the rack.
Some unfortunate (depending on how you see it) events occurred at this time as well. As I was trying to get everything back online after my move, I realized that not only had my Intel NUC fallen over, but my Synology NAS had a drive failure, and was running out of space. It also didn’t have enough free drive bays to cheaply expand the array, as I was using Raid 10 which doesn’t support using the existing array, but rather required enough total space in an entirely new array to fit all existing data.
At this point I accepted that I had made a poorly informed choice on the rack, and also that I was going to need a new NAS solution.
Replacing the NAS
The first thing I did - given I had already made a mistake with the 2U server build - was explore what rack mounted NAS options existed. I very much love the Synology appliance as its well designed and had been very stable. The challenge however was to expand to another unit, especially a rack mounted one, would have likely set me back $1,500+.
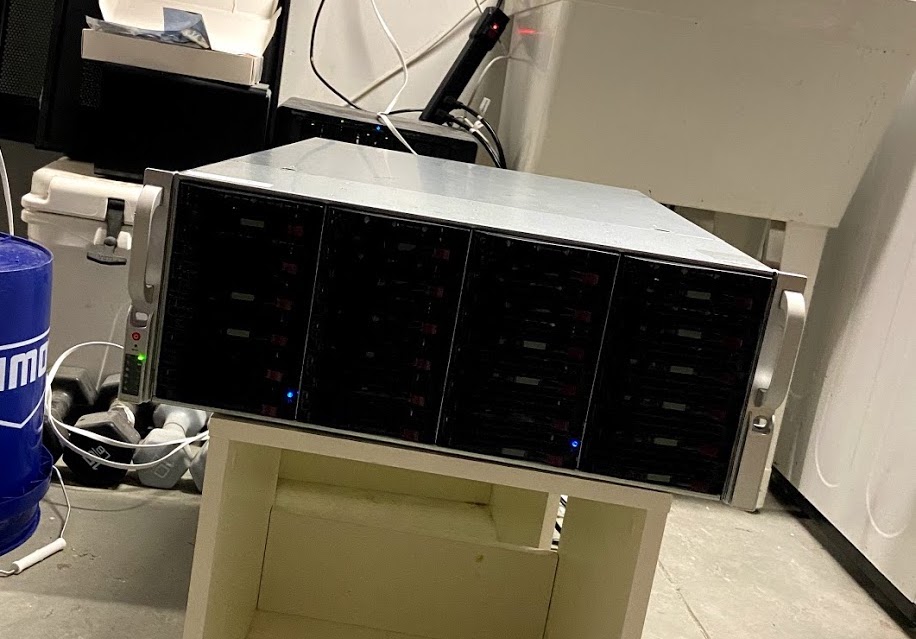
When I was talking to a colleague about this he suggest I explore reburbished servers, and I ended up finding a great 24-bay option for around $600 off of theserverstore.com. I purchased this and waited for it to arrive, to ensure I could appropriately measure the total depth I’d need for what was certainly going to be the largest component of the system.
When the server arrived I couldn’t believe the sheer size of the unit. Even though I’ve been in the software industry for 20 years, this was the first time I had ever seen one of these kinds of devices in real life.
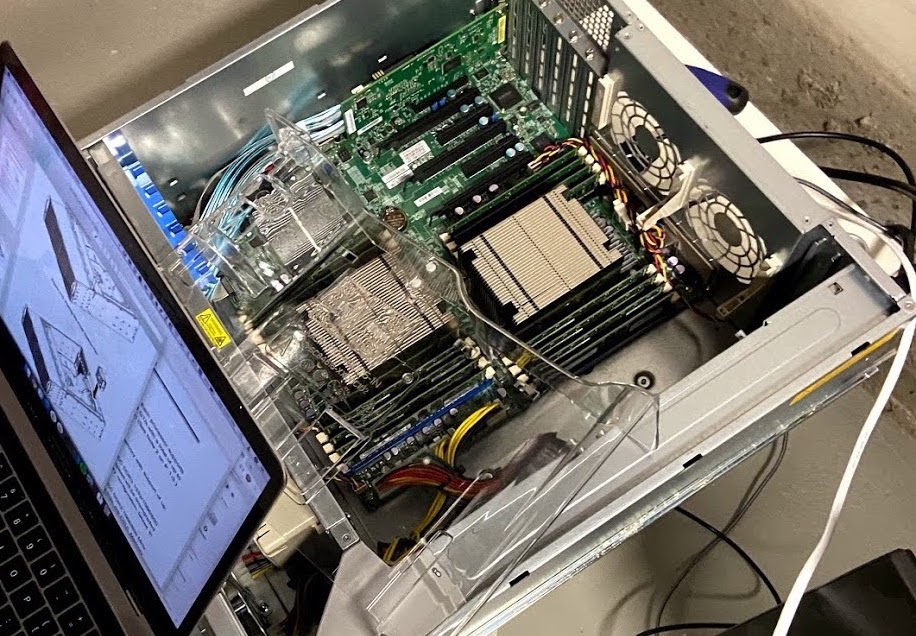
As soon as It arrived I began setting it up, but to my surprise it wouldn’t boot. This took a couple of days as I didn’t have a VGA cable (oof) so I had no display to work from. After going through and ripping it apart, reinstalling everything, and then individually testing all 16 sticks of memory I eventually found one that was bad. Nothing worth writing home over, as I still had 60gb which was just going to collect dust anyways.
The NAS was up and running (using Unraid) and transferring data from my Synology, so now we could go back to sorting out the rest of our problems.
Expanding the Rack
Finding a larger rack - especially with what I knew at this point - was a lot trickier. I knew that full size data center racks were extremely large, and most importantly far too deep to fit well in my garage. I also knew that I wanted it mostly covered given it was going to be in my garage and it would get fairly dusty.
I started by whipping up an excel sheet to figure out a rough layout for the rack. I knew it was unlikely I needed more than 20U, and I also knew the NAS was going to be the unit with the most depth. Pretty much anything else I can buy was a lot more flexible in its dimensions. So with that I spent a number of days searching for the options I had.
It was actually quite difficult to find selection on racks that were considered mid-depth. Mostly there was no single source of truth that would let me specify the range of depths I wanted, and there also seems to be a huge variety of manufacturers of these products. The biggest difficulty was that many of the more well known manufacturers didn’t actually sell what I needed.
Eventually I realized that some of the brands which I had seen on Amazon offered more consumer focused styles. I hunch is because these are often used for media cabinets more so than what I’m doing, but that didn’t matter to me. After searching through their official websites for a while, I found that Navepoint had a really fairly priced unit that looked nice and was also available to purchase on Amazon. It was larger than I needed, but that was actually fine as I had enough vertical space.
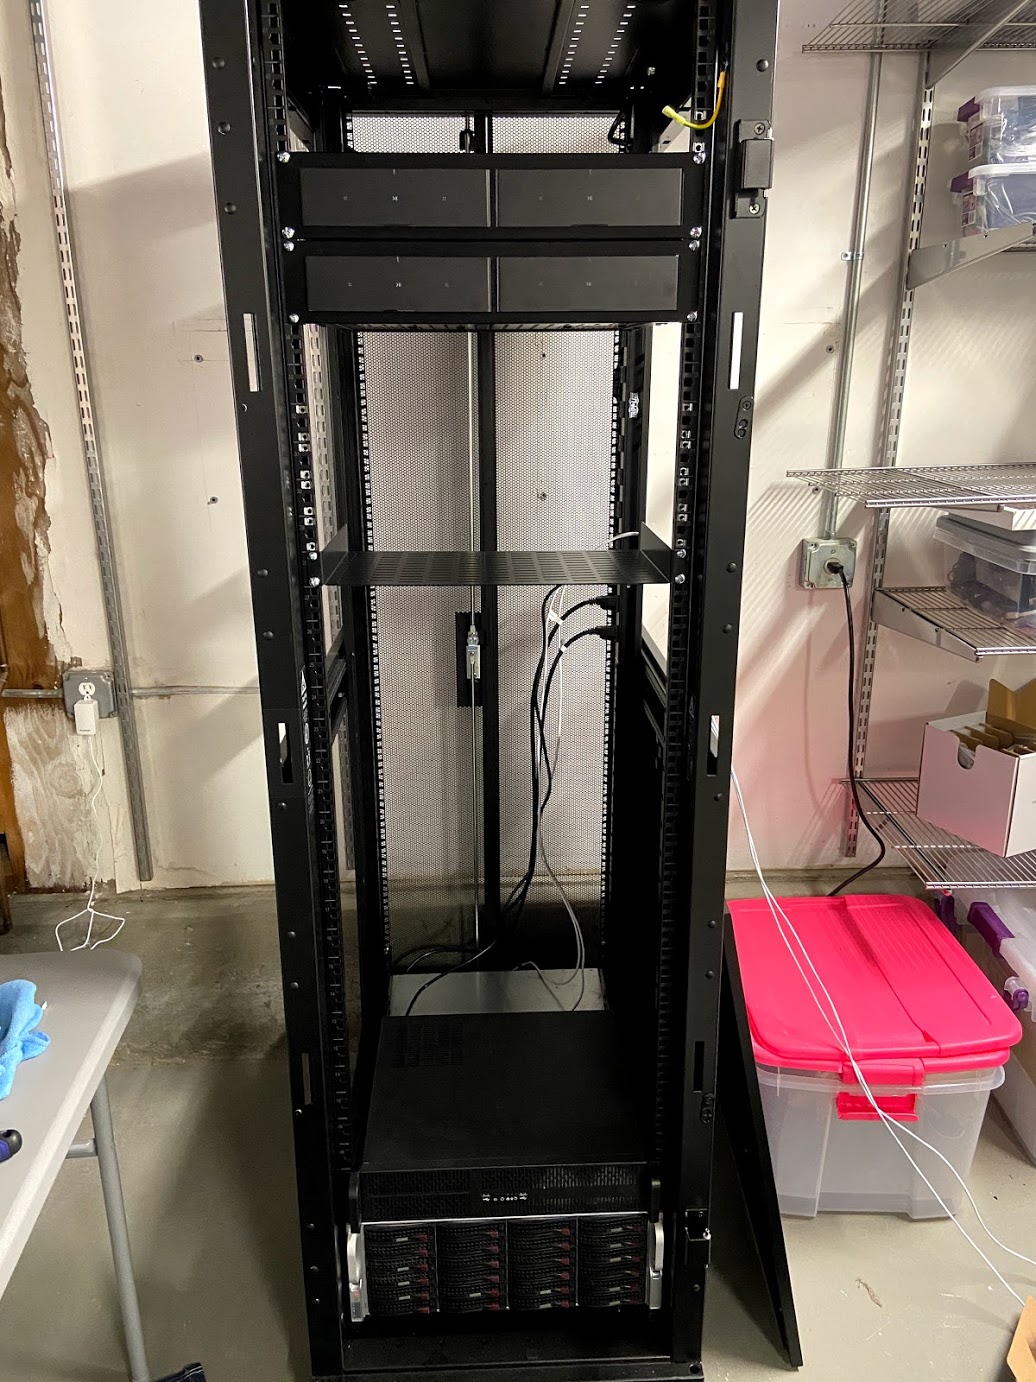
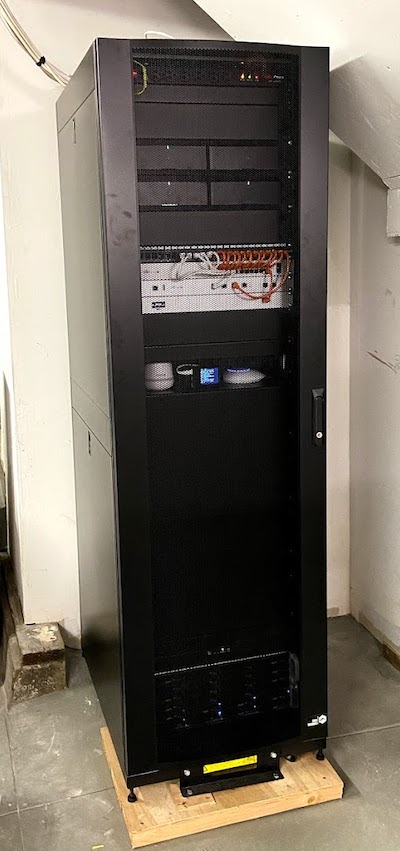
When it was all said I done, I landed on this 42U mid-depth rack from Navepoint.
Installation
First lesson: don’t try to unload one of these off a truck by yourself.
I set up the rack in what I thought would be its permanent home - a nice open area next to some shelves running along a wall in my garage. I later changed this due to fear of one of the water-filled pipes in the rafters bursting and racking up an enormous bill. All in all, the rack looked great, and the features were exactly what I needed.
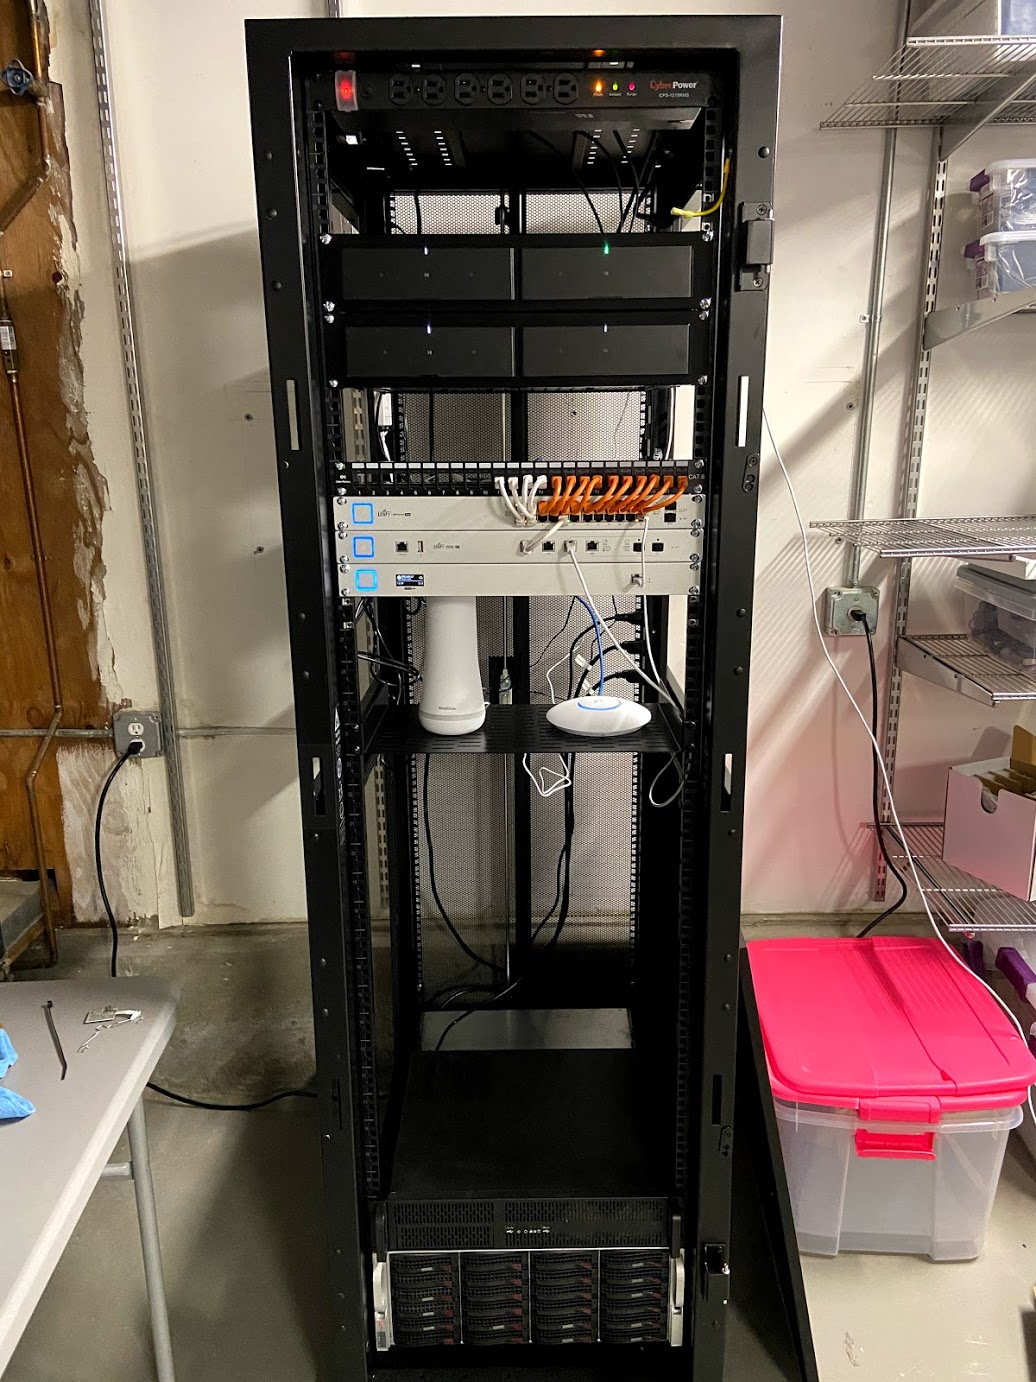
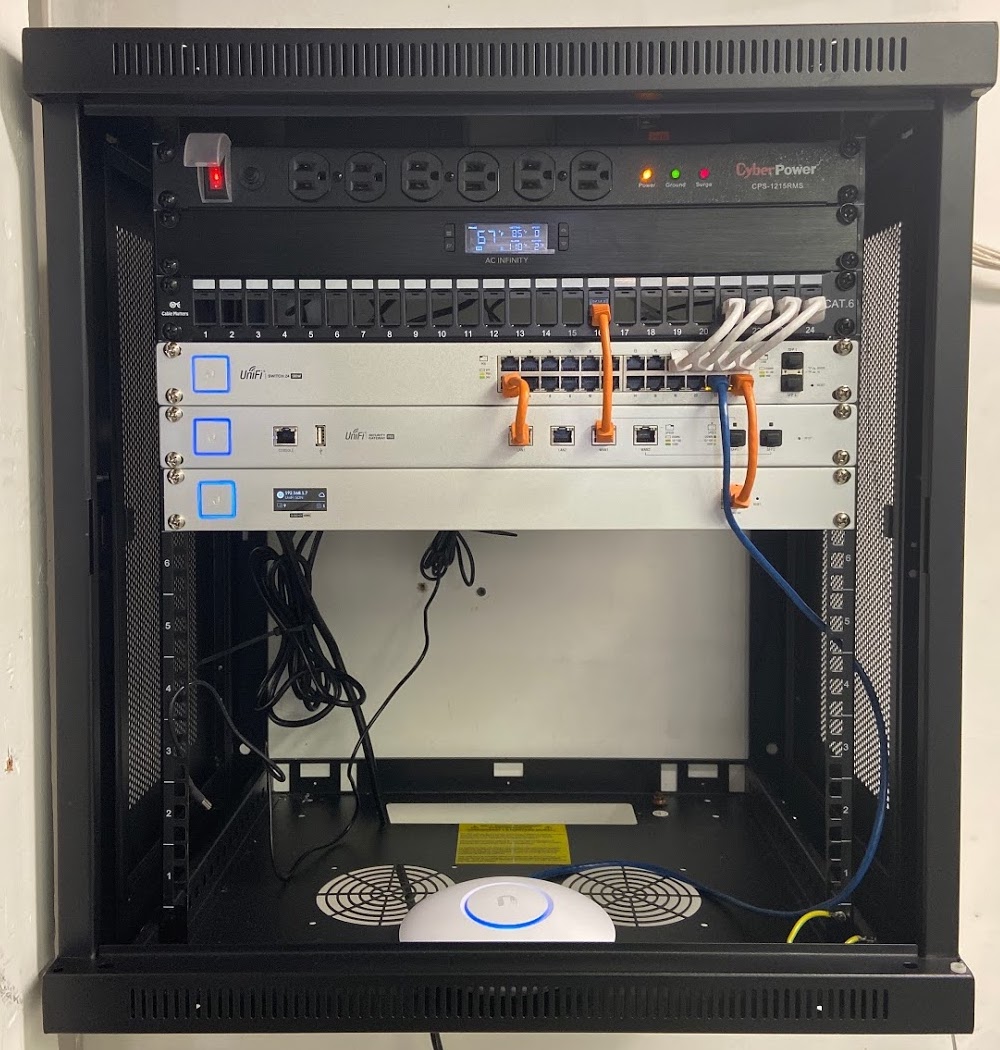
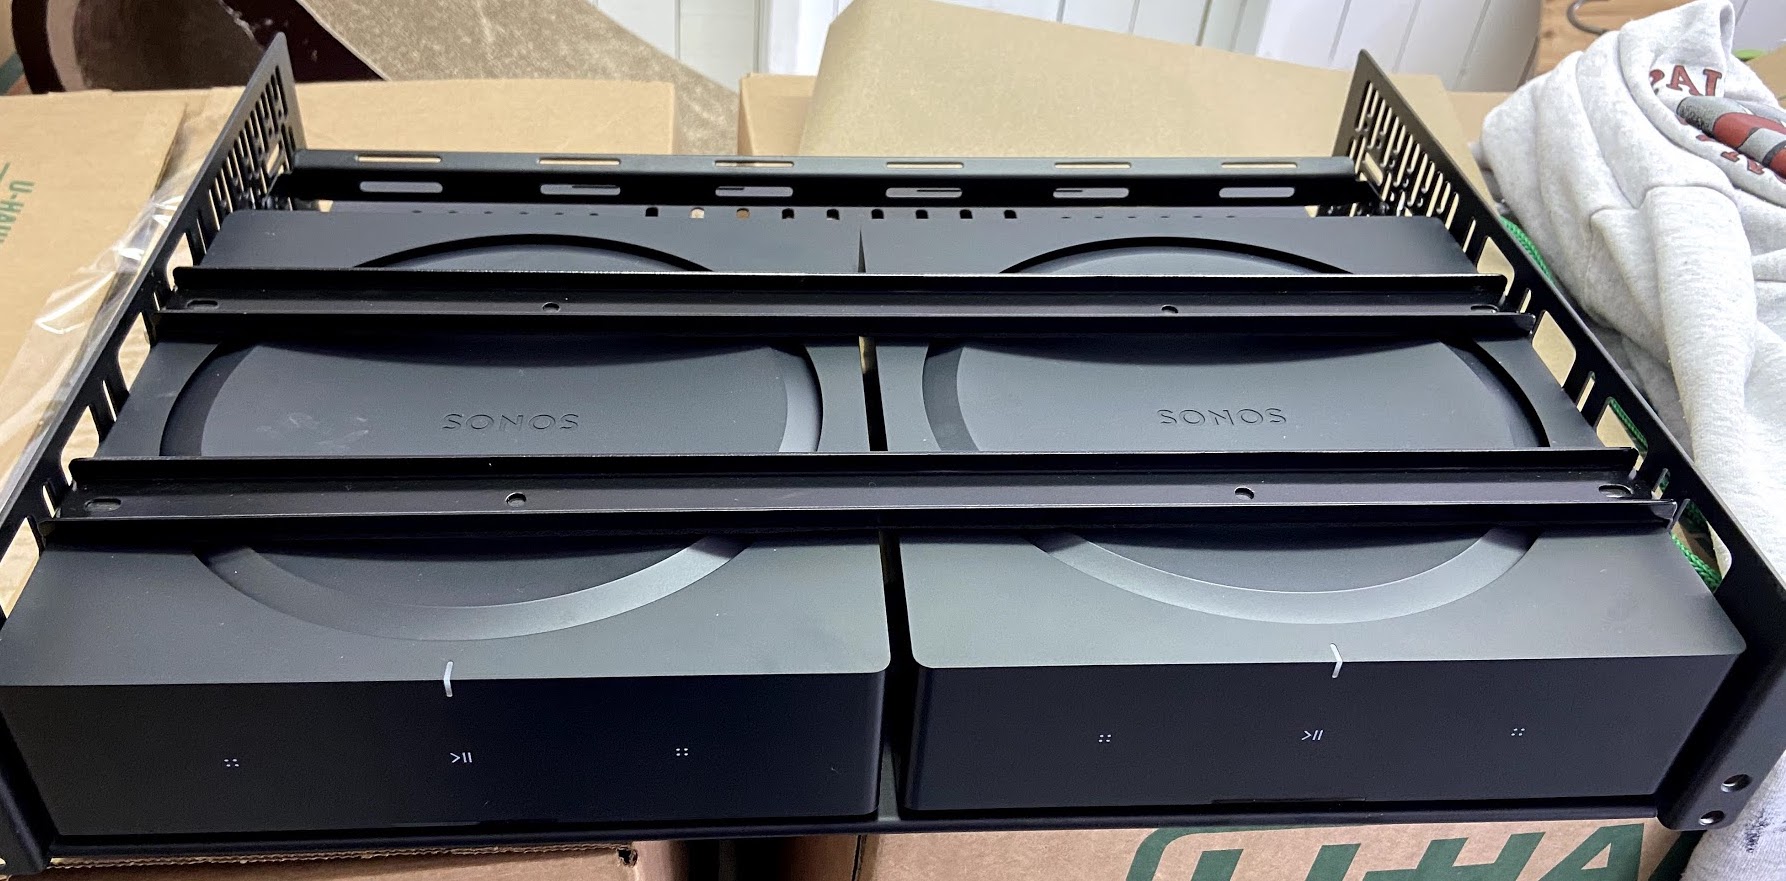
I had gotten the Sonos Amps rack mounted at this point, as well as we NAS and 2U server. From there I moved over the networking gear and began visualizing what I might want to change. I knew I could start actually finalizing components. No more was I doing temporary work, things that were getting installed were going to be in their final homes.
Over the next few weeks I began moving devices over, rerouting and cleaning up cables, and filling in the gaps (literally). This was my first time ever working with a system like this, and overall I’m pleased with the final result. There’s some things I may look to clean up down the road, but all in all its in a good place.
Part Breakdown
Here’s a list of what’s currently in the rack:
- Navepoint 42U rack
- UniFi Switch 24-port
- UniFi Security Gateway Pro
- UniFi Cloud Key Gen2 Plus
- w/ Cloud Key G2 Rack Mount Accessory
- 4x Sonos Amp
- 2x Sonos RSH Rack Mount kit
- 2U custom-built server
- 4U Supermicro 24-bay NAS
- Various Navepoint panel blanks
A few devices which are sitting on the rack shelf:
- UniFi AC Lite - temporary location
- Pi-hole w/ PADD
- SimpliSafe controller
And out of sight zip tied or otherwise mounted inside of the rack:
- Lutron Connect controller
- Lutron Extender
- Philips Hue controller
Part Two
I’ll be writing about what’s actually going on with the server and NAS, mostly with my ongoing Home Assistant learnings. If you’d like to explore on your own, I open source the majority of my configurations and the README contains some high level details.